
How many Aussie Kizashi owners are out there?
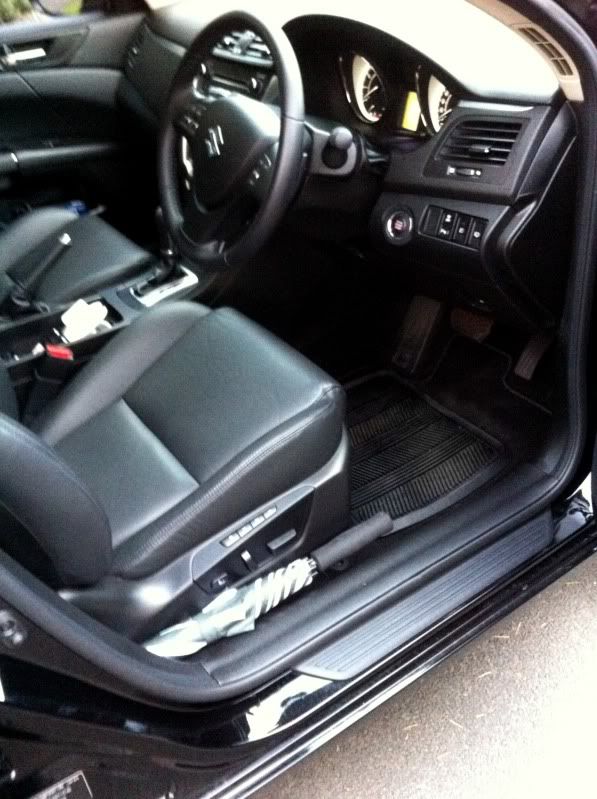
The dealer gave me a discount on the floor mats & I think I paid $130 - 135, something like that. I would have liked to see a rubber heel pad on the drivers one though as it is already showing signs of wear. Thanks for the info laurenson, I will keep that in mind if I have to replace them
Thanks for the info. I'm going to check it out tomorrow.Laurenson wrote:If you are like me and couldn't afford the genuine floormats at a rediculous $194 then there is a good fitting set at Autobarn for $34 (4 piece set) Monarch made by Carfit, Command Auto Group. Only small nick required at drivers left foot rest. Look great !
I got the genuine floormats as part of the deal when buying the car. I like the look of it and how it's stuck in place. But, the heel area is starting to wear and I don't think it will last another 6 months.
Hmm, so I'm not the only one. The odd thing is that the wear area is front centre of the drivers mat, not where your heel rests??? I also noticed today the silver stitching on the back of the drivers seat is fraying,,,,,,not happy Jan!!! 

Hi topcat45, I'm very interested to have those lights installed too! You haven't got round to putting some photos up yet? Like to see how they look and how you wired them up.topcat45 wrote:forgot to mention I installed LED running lights just above the spotlights & they look awesome, gets a lot of looks
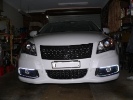
Well this is what the LED strip lights look like. Don't bother attaching them with double sided tape as I first tried that & they stayed put for about a week before starting to peel off. I then used Selleys quik grip advanced which goes on white & sets clear. This works well but notice that one of the globes on the lower end on the drivers side has already gone & they are only a couple of weeks old & I am not sure how easy they will be to remove should more go & I have to replace them. I thought these things supposed to last for ages? (not happy Jan). Anyway, you will have to attach extra wires as the lead isn't long enough to reach the power source. The engine bay fuse & relay box is located near the battery. Open the lid & power is sourced from the rear demister relay as indicated by my finger (thanks to a previous post for this info). Remove this relay & insert the 2 positive wires into the slot for the rear pin closest to the firewall as this one is powered with ignition then reinsert the relay. You can see the 2 red wires that I refer to. It's a bit crude but it works & saves you cutting or splicing any wires etc
- Attachments
-
-
-
Sorry, forgot to mention in the pic showing the relays you can see a blue connector top right of the pic with 2 black wires. That's the earth for the LED's. The earth is actually outside the relay / fuse box but I fed the power wires in from the bottom so I could close the lid without having to drill entry holes in it. Find the access hole, poke down a piece of stiff wire, connect this to the 2 positive wires & pull them back up
That's great, always good to get new ideas from others. Even though I have sold my WRX I am still in the NSW club & over the years the amount of shared info has been phenomenal. Let's hope that folks in this forum will do the same 